


 Bullets 125 Gr Semi-Spitzer Pk/100 ea")
How to Powder Coat Your Bullets
How to Powder Coat Your Bullets – Quick and Easy
By: Drew Joszku
Using powder coating on lead projectiles is fairly new (it has actually been around a lot longer than people realize but it has really begun to catch on recently. A lot of people who grew up and learned without it seem opposed to it; which is how I felt…at first. After I saw how much trouble it can save you, the additional velocities it allows you to get with lead and how much cleaner my barrel was, I became very, very curious. My first research turned up a process in which people were buying somewhat expensive tools used specifically for powder coating. They work using static (from what I have read and been told) and they were a bit out of my price range. Eventually, I stumbled onto a few other recipes that only needed a few, easy to acquire items. I’ll detail those below as well as instructions. The total cost to get setup is under $20 or $30, including a pound of powder coat (which should last a good while). Before we get there, I do want to point out that some experiments and such have been carried out to make sure that powder coating doesn’t harm the bore of your firearm but as with all of these articles, please make sure to do your own research and make your own decision. The powder coating is actually something like polyester and slick; acting like a lubricant without the sticky mess.
There are many ways to accomplish our end goal but the method I am laying out below is the most simple and effective for the time it takes. There are some more expensive and complex methods that might produce a result that looks a bit better but you will pay more for it (in time and money).
Here is what you will need in order to get setup:
Toaster oven ($10 to $15) –
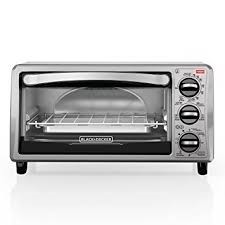
This can be acquired at a local thrift store for a pretty decent price. I have picked them up for under $10 before. You do have to make sure to have a thermometer on-hand to measure 400 degrees F. You can buy a new one for $20 on Amazon if you prefer to go that route but it’s recommended to still check the temp as they can fluctuate. Please make sure that you never, ever, use food in a toaster oven or pot or pan, anything really, that you’ve had lead or anything similar in. Lead can be toxic, especially for children and exposure can be avoided. Also, find a spot outside to cure these.
Plastic Airsoft BB’s, Black ($5 to $10) –
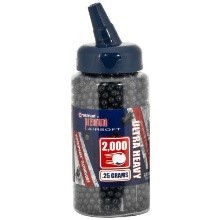
This is easy to get and can be found at your local Wally World. It is important to get black bb’s as they are more dense and create a better static field. You can substitute other colors but your mileage may vary.
Number 4 or 5 Type Recyclable Container with Lid (IE: Cool Whip/TupperWare containers – $3) –
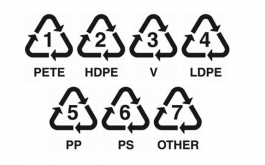
This is a lot easier to find than you might think. Look on the bottom of an old butter/margarine tub for that symbol that has a “4” inside the recycle logo. The lid does NOT have to be the same type of plastic but the container does have to be specifically that. It is otherwise known as “LDPE”. This type aids in the production of static electricity, which helps the powder stick to the lead projectiles.
Lead Projectiles (Cost not included as they should be around if you cast) –
They need to be clean, dry and unlubed. Other than that, you should be good to go.
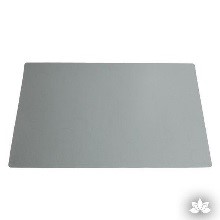
Baking Mat/Silicone Baking Tray or Non-Stick Aluminum Foil (Free to $5) – This can be had for free from the wife’s stash…but I’d advise against it as it might become a point of contention and also, once used, I’d avoid food on it. You can use a tray that comes with a toaster oven as well.
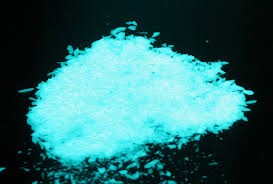
Powder Coat (Ranges from $10 and up per Pound) – I bought a pound of the cheapest stuff I could find on an auction site and it was about $8 but I usually see it around $10 to $15 a pound. It depends on whether or not you have preference in color. I didn’t and ended up getting red because of the price. If you want to get some sparkling or chameleon colored coating, expect to pay a premium. This is totally a personal preference choice. When you get it home, do take care with handling because if you drop it and the bag busts, it is not a fun cleanup (ask me how I know). A pound should last a good amount of time. I do not have any firm estimates but I can tell you that I have coated 300 or so projectiles and still have a ton left. A little bit will generally do it and can go a long way. Harbor Freight is another option but I’ve read a lot of mixed reviews concerning utilizing it to coat projectiles.
Tongs, Pliers or Something to Grasp Coated Bullets (Free and up) – Once the projectiles are coated, you will need something to pick them up and set them on the tray to cure. I use either needle nose pliers or tweezers. Find what you are comfortable with.
Procedure:
First, setup the toaster oven outside by plugging it in and preheating it to 400 degrees F so it will be ready when you are done with the prep.
Next, take your #4 or #5 container (one around the size of a plastic whipped cream container works well) and fill it about a quarter or a third of the way full of the black colored airsoft bb’s. Take about 2 ounces of the powder that you are going to use to coat them and add that. Next, add about 20 or so projectiles that you want to coat.
After you’ve got your projectiles in the container with the bb’s and powder, make sure you put the lid on while making sure it is on very securely. Some people have found some containers that fit the bill but also have a screw top…that wouldn’t be a bad idea. A word of caution; the powder can get everywhere unless you aren’t careful. I would also advise against inhaling it.
Now, with everything in place and the lid very, very secure, shake vigorously for about 30 seconds or so. The point of this step is to generate static electricity inside the container; which will draw the powder to coat the lead projectiles. I usually do 30 seconds of shaking up and down and another 30 seconds shaking back and forth…with some rolling around as well to make sure everything is coated and ready for the oven.
After shaking, I set the container down for about 2 to 3 minutes to let the powder settle from the air inside. Remember, we want to avoid breathing this stuff in. If you open it right after shaking it around like crazy, the powder is likely going to get some places that you’d rather it avoid. While I am waiting for stuff to calm down, I grab the tray they are going to reside on and set that up so I can transition everything from the container to the toaster oven. I also do this and the shaking near the toaster oven so I don’t have to walk with the powder coated bullets before curing them.
Here is the fun part...Finding the coated projectiles! This part is the step in which the tweezers and/or pliers become handy. They help keep the powder on the projectiles instead of coming off on your fingers. You will need to take the tweezers/pliers and dig around for the projectiles. It is surprising how “lost” they can get in some airsoft bb’s but it can be time consuming sometimes. Nonetheless, when you find them, make sure you grab each one above the lube grooves so you can keep those properly coated for the curing process. They need to be coated well to give us the lubrication advantage that is inherent with powder coating.
As you find each projectile, move them to the little pan they are going to sit on in the toaster oven. I make sure the pan is flat so I can stand the projectiles up to avoid disfiguring any of the coating. I’ve actually experimented a bit and I have found that when they cure while laying down, the result is actually not terrible and I still use them for plinking nine out of ten times. If you want them to be presentable, having them rest on their base (or nose, depending on the type of projectile), is the best option.
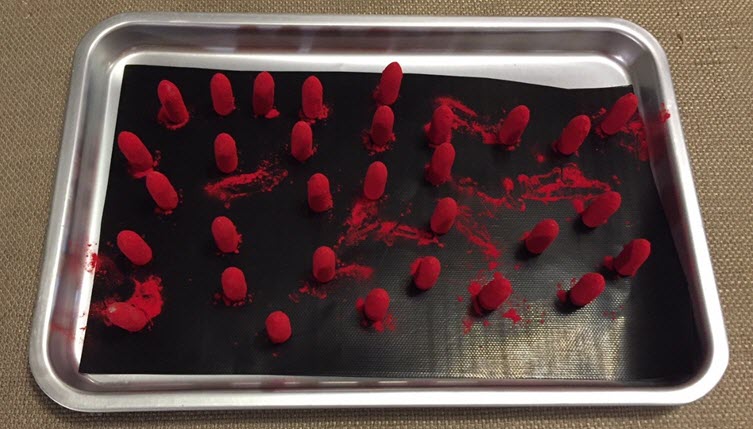
After you get all moved to the pan, it is time to move it to the heated toaster oven. This is the most frustrating step for me because if one falls, I try to stand it back up and then it knocks over other ones. This is a sort of domino effect and not a cycle you want to find yourself in. I’ve made myself just leave one if it falls over because I know it’s better than knocking 10 more over trying to fix the orientation of one. After you gently place the pan in the oven, set a timer for 10 minutes (you actually might need to do 15 minutes for some powders but most I have seen is around 10…read the instructions for curing either way and use that information).
Once the 10 or so minutes of the curing time is up, let’s turn off the oven and open the toaster oven door. This is a personal preference of mine as it seems to help bring the finished product back to a temperature I can touch a lot faster. I would wait about 20 minutes or so before touching. You can use a non-contact thermometer to verify when they are cool enough to handle, however.
My favorite part is next...admiring and inspecting your creations. Make sure you check out each projectile and look to see even coatings around the lube grooves and places where the projectile meets the barrel. It is okay for parts of the tip to be missing a bit of coating (IE: Handle marks from tweezers, etc) but the lube grooves and base should be coated. Sometimes the base gets a little extra that sort of melts around it but that part is easily removed. Believe it or not, most people, including yours truly, report some great results the first time around. It is a lot easier than you probably think as the powder seems to be more forgiving than other things.
After they are all cooled, inspected and complete, you can move on and size and reload them. Some people like to size projectiles before and after they do powder coating but to me, it can introduce residual lubrication and such onto the projectiles which could keep powder from sticking so I do my sizing after coating them. This is another personal preference but I recommend sizing after. The powder coating could add 0.001 or so on each side but that isn’t always the case for me.
That’s it! While I know this article is almost 2,000 words, the process is really quite simple, pretty inexpensive and extremely beneficial if you are having leading problems or want to push lead a lot faster. I’ve used this method for 223, 300 Blackout, 7.62, 9mm, 45 cal and 8mm Mauser projectiles and it has been fun and rewarding. I’d probably keep the velocities around 2,500 FPS or lower but it still opens up options for lead projectile usage and plinking.
As with all articles on this site related to reloading, these are for informational purposes only. Any and all actions taken by the end user (IE: Reader) are the responsibility of said end user and not the author or website hosting this informal document.
Note: Drew Joszku is an accomplished writer as well as an expert reloader. Some of his articles can also be found on USACarry.
For more more information about reloading, check out Hunting Gear Insiders reloading guide.